After many years of service, the original NutriCherry herb bed started to fall apart and needed an overhaul. I’d recently bought and built a new shed, and it seemed like a good idea to build a new raised bed for herb growing next to it. Along with being quite a sunny position there, the shed base was built up on uneven ground so also provided a bit of extra ballast.
I like growing herbs for use in cooking, you can chop them up whatever way suits the recipe you’re working with, and you have the pleasure of knowing that you grew them yourself. For many but not all herbs, they will have a more delicate taste than their dried alternatives, but you’ll soon get used to working out how much of each is needed. I generally find somewhere between around 50-100% more is needed. I’ve got a guide to making italian herb mixes that goes into more detail.
In true form, I had quite a bit of wood from the palette that materials to make the shed base came on, and I reused it to make the herb bed. In terms of making the bed you just need to determine the length, width and depth, this may be to some extent decided by a mix of what you need and the wood you’ve got to hand.
What herbs grow well in the UK
My favoured herbs for growing in the UK are Rosemary, Oregano, Thyme, Parsley, Sage, Mint, Dill and Fennel. They all grow exceptionally well in our climate without needing any special measures. I tend to shy away from Basil as it just doesn’t seem to grow well, at least outside. Maybe in a poly-tunnel or greenhouse things would be different. If you grow mint in the bed, I would put it in a container to avoid its roots taking over the whole bed.
How I built the raised bed from a palette
First and foremost, measure everything out to ensure that you both have enough wood to build the bed to the desired size, and that it will fit both in terms of its raise and in terms of size. Once this is done, calculate the lengths of wood to cut for the width and length. Then based on the type of wood you’re using for the outer shell, determine how many pieces up you’ll need to go up (you’ll need twice this number for the four sides).
Don’t forget if building onto soil, then the vertical posts need to be a bit longer because they need to be dug into the soil to hold the bed in place. If you’re going to hammer the posts/stakes in (I normally don’t preferring to dig the hole instead) then cut the ends using a mitre.

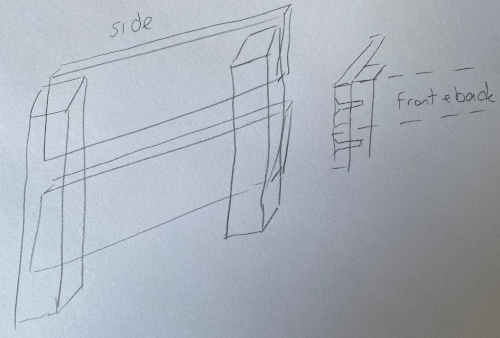
Exploded diagram of side of raised bed
Once the wood is cut to size. Start with two sides, and I always find it better to start with the two smallest sides. Make sure the vertical post and the lengths making up the shell are square and screw them together, screws go from the shell side into the post.
Now that you have the two side pieces, we can test fit them into place, use one of the connecting outer shell lengths as a guide, and then level out and put the other side into the ground (again I normally dig the hole for the post and then back-fill after). Lastly, screw the shell pieces to the posts and job done.

Zoom in on a corner of the raised bed
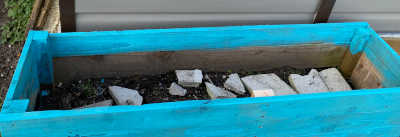
Depending on how you’re situated you may want to fill the bottom of the raised bed with a few stones, this will reduce the amount of soil needed to fill the bed, and also make it easier for water to drain. I had some old flags lying around and used a few of those.

A few stones in the bottom of the raised bed
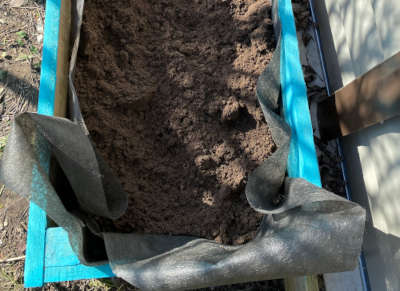
Lastly, I personally tend to use a weed screen in the bed, if you decide to do this, just roughly cut a screen to a length longer than needed, then fill it with soil, you can use scissors later to cut it to size.

Raised bed with weed screen filled with soil
These may be of interest
- Similar - March - preparing seeds for growing
- Similar - Make your own italian herb mix from scratch
- Similar - Introducing the nutricherry herb garden
- Recently published - Bread maker Malted flour loaf}
- Recently published - Book review: Little Book Of Pasta, Rufus Cavendish}
- Recently published - Bread maker Olive and Italian herb loaf}
