Even though bread often has just a handful of ingredients, it is actually quite difficult to get good results. As with most people starting out bread making, my first loaves were heavy and borderline inedible, even when following instructions quite closely. That led me to to read a few books on baking, then I understood a few things:
Some bread-making key points
- Firstly, conversely to what you may think, the crisp or crunch of the bread crust comes from moisture and heat at the same time (there needs to be a good bit of moisture in the oven and it must be hot).
- Secondly, you cannot short-cut the mixing, kneading and proving, I.E. the dough must be left to double in size at least once and then after shaping it must double in size again. It should be left covered in a warm place.
- Don’t underestimate the ingredients, flour makes up the vast majority of the ingredients, so buy a good quality flour, organic if you can. I like using fresh yeast if I can find it too.
- Make sure you stretch the front dough, most books on bread go through this, but what you want to do is pull and stretch the top so it raises nicely.
- It is better to over bake than under-bake as you get a thicker crunchier crust.
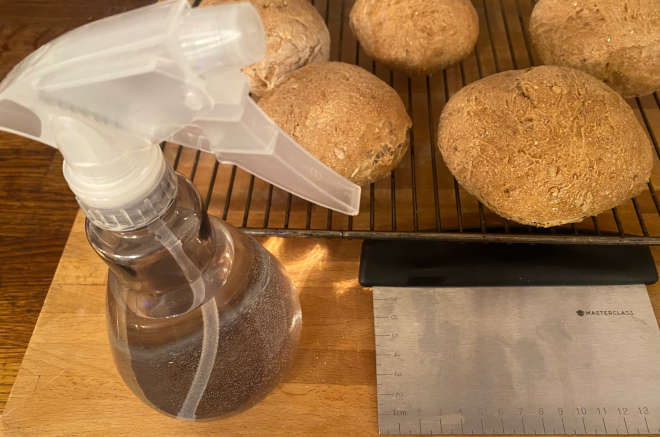
- See my list of helpful tools for bread-making. These are tools I use very frequently. Not all essential but extremely useful.
Flour Protein/Gluten content
Each type of flour has different amounts of gluten, it is the gluten that makes the dough springy and able to rise. For wheat flour, generally speaking “Self raising flour” and “Plain flour” have the least gluten, while OO and strong bread flour are high in gluten. Wholemeal flour has less gluten than white flour given that it contains some of the outer shell or bran. Lastly, Rye and Spelt have very low gluten so I’ll often combine them with white bread flour to be able to use them in the bread-maker.
Kneading and proving
Maybe I’m lazy, but I nearly always use a bread maker on the dough setting to do the kneading and mixing for me, it produces excellent results every time, and saves you some time along the way. Once the dough comes out of the bread maker, dust a surface lightly with flour, and slightly work the dough to get it into the approximate size and shape that you want. A dough scraper makes cutting dough up much easier.
Baking time and cooking temperature
When you first put the bread in the oven it is dough, so we can think of it as a timeline, at the start of it we have dough, if we leave the bread in too long, it will eventually burn, we want somewhere inbetween. The longer the bread is left in, the crunchier and thicker the crust will become.
Before warming up the oven arrange the oven shelves suitably for the task. Unless otherwise stated, center of the oven is a good bet.
Preheat the oven and wait for it to get to temperature, at least 220°C for bread making or even as hot as it will go. We don’t want to lose the heat for the first part of the bake, so ensure the oven door is opened only as long as absolutely needed. If you have a water spray mister then spray the dough with water now. Open the oven door, put in the tray, and lastly spray more water mist into the oven aiming near the dough and sides then close the door.
If you want:
- softer bread, keep the temperature higher and cooking time shorter.
- crustier bread, turn the temperature down after about 3-5 minutes to around 180°C, the longer bake the most crusty it becomes.
Further reading
There’s a few books on bread making that I’ve read, but to me, the one that really got me started was the River Cottage book on bread, it covers the main steps needed very clearly and concisely as well. At some point I’ll write up all the books I’ve read with a brief overview.
Also, now and again, as I get better at baking, I update the photos with better attempts!
These may be of interest
- Similar - Tools needed for bread making
- Recently published - Bread maker Malted flour loaf}
- Recently published - Book review: Little Book Of Pasta, Rufus Cavendish}
- Recently published - Bread maker Olive and Italian herb loaf}
